

The first thing I thought of when I saw the box weave bracelet was a fancy men's bracelet that you'd see on a well-off guy on a TV show or movie. It was too neat of a weave to pass up, so I decided to use bright colors to make it a little more girly. The pictures made it look pretty complicated, but it turned out to be fairly easy once I got the hang of it. Read on to see how you can make one too.
Here's what you'll need:
- 75-100 color A 18-gauge 4.2mm jump rings
- 75-100 color B 18-gauge 4.2mm jump rings
- Clasp
- Clasp rings

Tie off the 3 purple rings on the left to keep them out of the way while you work. I used a random orange ring that was lying around, but you could use whatever is nearby.

Flip the two free purple rings on the right back so that the parts farthest to the right are inside the pink rings like this:

Open 2 pink rings. Pick up the start of your bracelet with the two backwards rings between your thumb and pointer finger. Separate the pink rings so the purple rings show through the middle.

Insert 1 of the open pink rings through both backwards purple rings and close it. Do the same with the second open pink ring. The newly added pink rings should be between the others like this:

Now open 2 purple rings. Insert each of them through both of the pink rings you just added like this:

Now we're going to repeat. Flip the two purple rings just added so they are backwards with the part farthest to the right inside the pink rings as you did earlier.

Open 2 pink rings. Holding the purple backwards rings between your thumb and pointer finger, separate the pink rings like before. Take one open pink ring and pass through the backwards purple rings and close it. Do the same with the second open pink ring. Here's how it should look at this point (it's flipped on a different side here to show how the newly attached pink rings are between the other pink rings):

From this point, continue adding 2 purple rings, flipping them backwards, inserting 2 pink rings to hold them in place, and so on until your bracelet is long enough to wrap around your wrist. You should end with pink rings to hold the last backwards purple rings in place. You'll already have two pink rings there, but you'll need to add one more to keep everything in place and make it even with the other end.
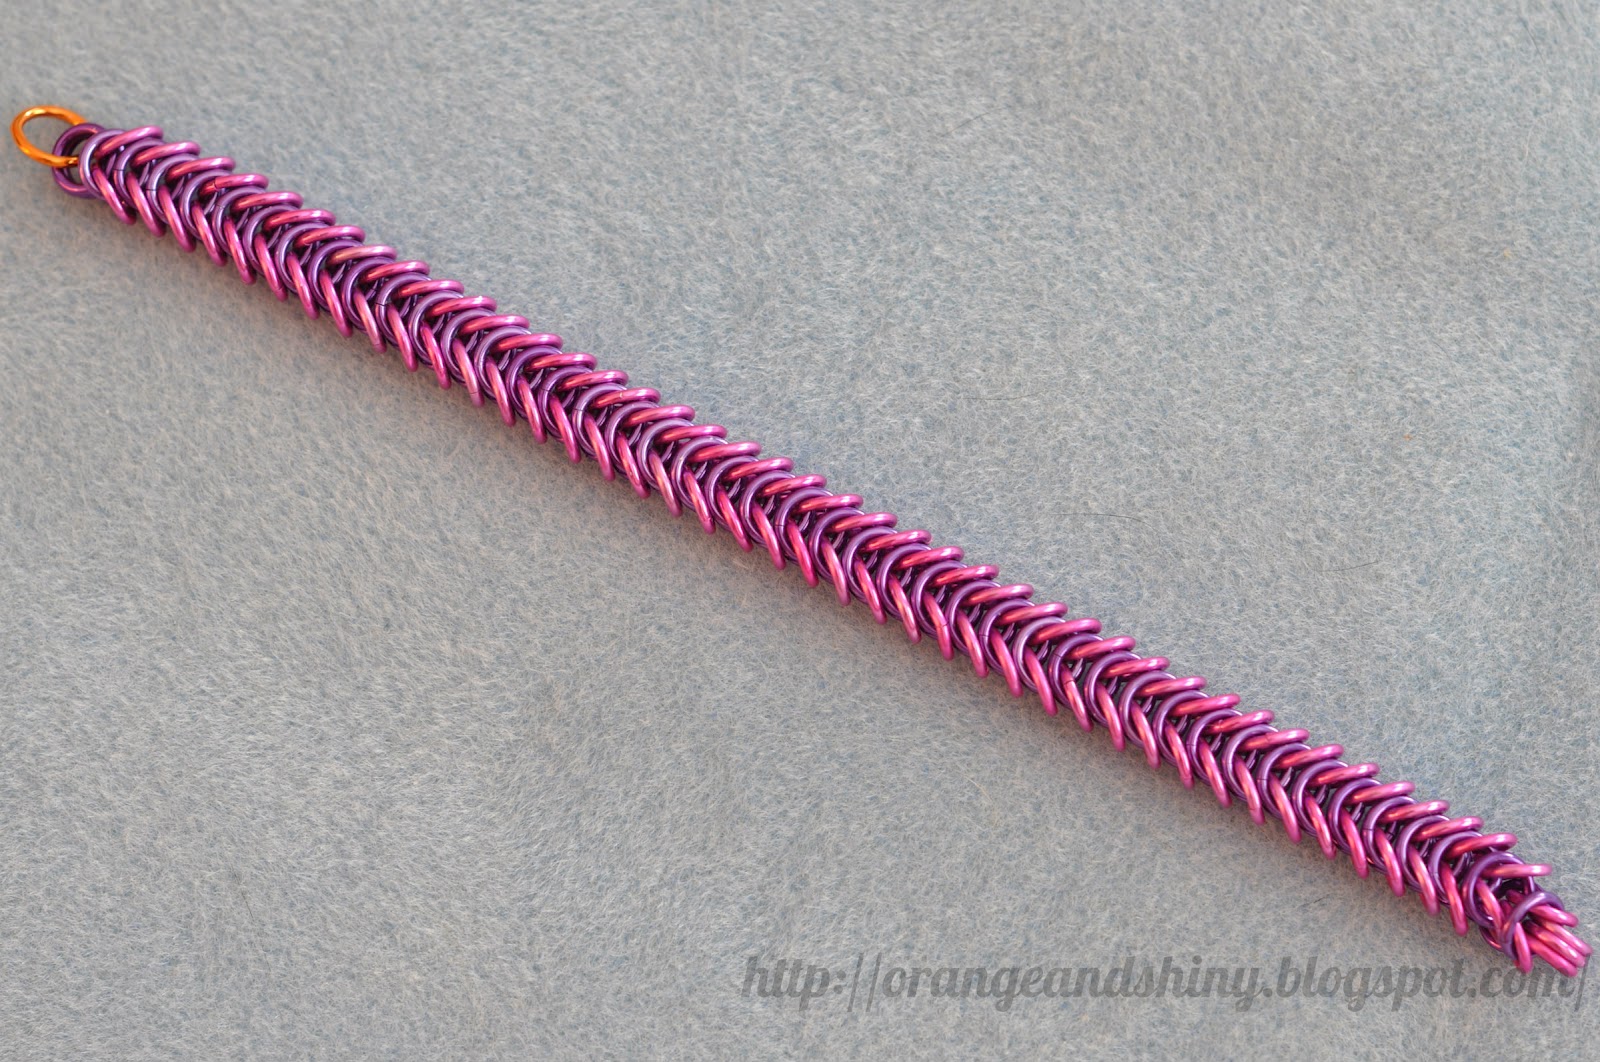
To finish the bracelet off, remove whatever you used to hold the purple rings on the beginning end together(the orange ring in my case). Attach your clasp to the bracelet with a clasp ring. In order to avoid scratching the pink rings on the other end, I added a few clasp rings to hook the bracelet together.
All in all, this was a fairly easy project that wasn't too time consuming. I'm considering doing some of these bracelets as Christmas gifts since they'd be far easier and work out better than last year's cellini spiral disaster (more on that some other time). I think chainmaille is my new favorite hobby.
I like how this looks. Both the bracelet and the page. Keep up the good work. Mom.
ReplyDelete